
Live Event Video Lighting for Depth and Clarity
A stage can look dramatic in person and still leave speakers hard to see on camera. Effective lighting for video recording at a live event starts with coordination between the lighting and video teams: balance stage color and brightness, set camera exposure and white balance manually, and test fixtures through the camera before the audience arrives. Controlled front or side fill keeps faces clear, while backlighting preserves atmosphere and adds depth.
A polished recording should preserve the live experience without letting shadows or changing cues distract from the people on stage. This guide explains how to coordinate event AV, shape flattering light, reduce unwanted shadows, and maintain consistency for smoother edits. Camera tests, carefully planned cues, and a steady base look matter whether the event is recorded for later viewing or streamed live.
Key Takeaways
- Coordinate lighting cues, camera settings, and stage activity so key moments remain clear on screen.
- Use carefully balanced front or side fill with backlighting to keep faces visible without losing the atmosphere of the event.
- Shape light around presenters to soften distracting shadows and give the stage more visual depth.
- Keep core lighting consistent across cues to make shots easier to match during editing.
1. Coordinating video with event AV, stage, screens, and lighting
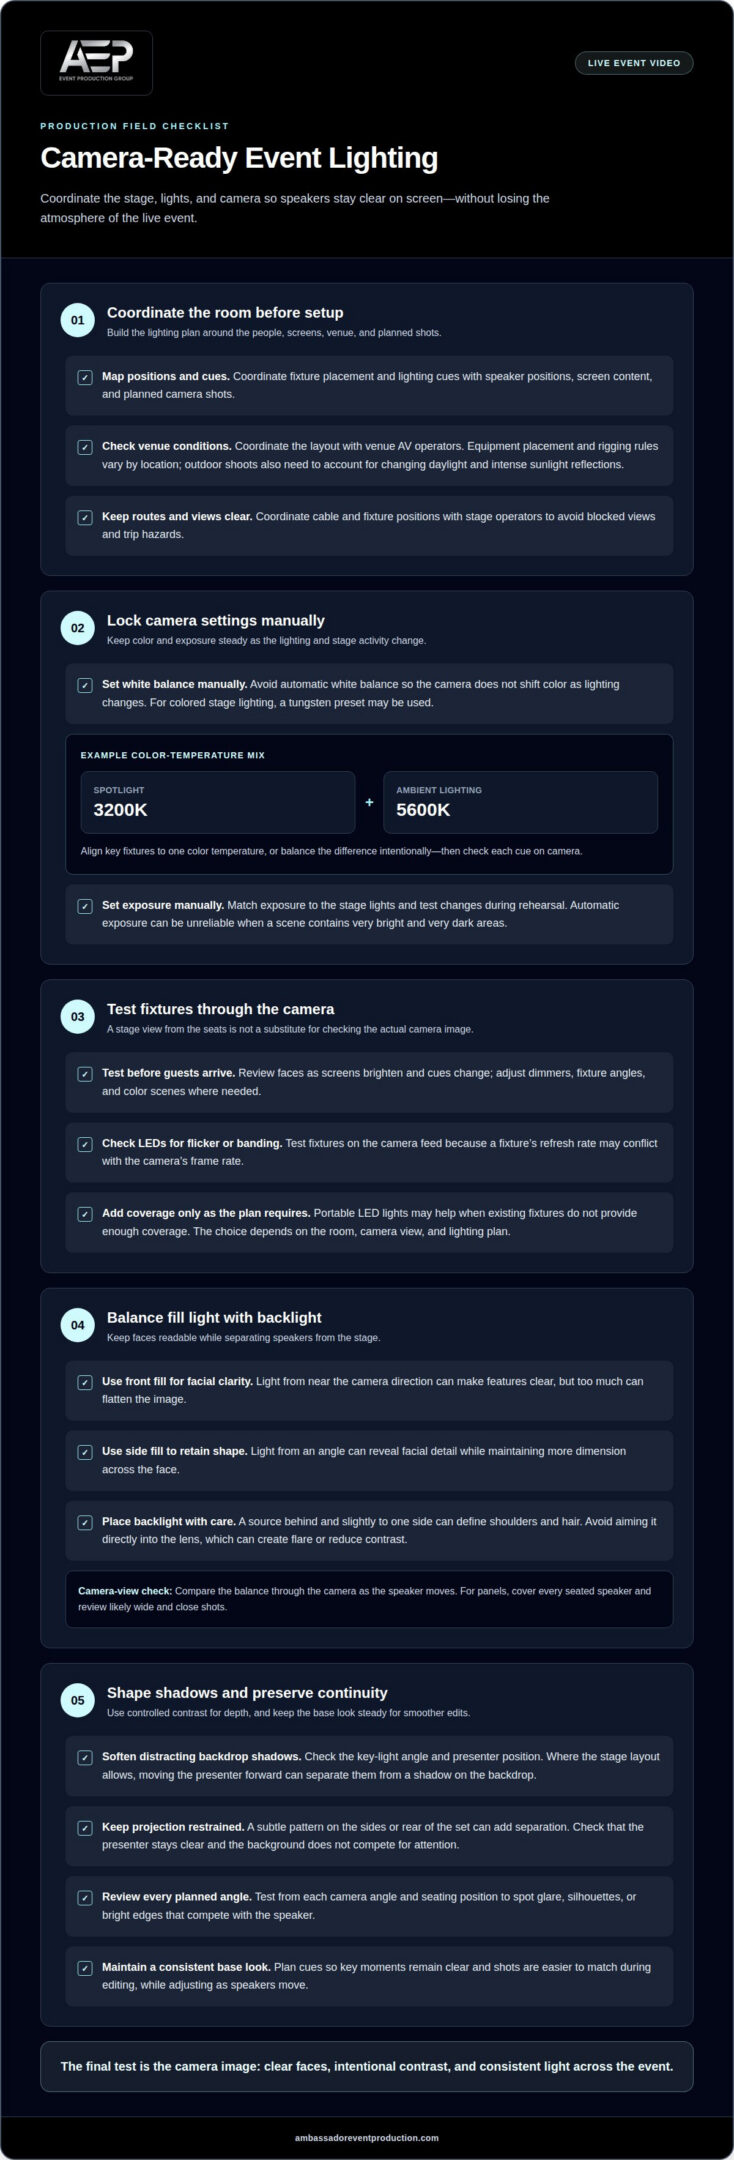
Good lighting for video recording at a live event begins with the stage, camera, and event AV plan working together. Operators coordinate fixture positions and cues with speakers’ positions, screen content, and planned camera shots. Before guests enter, they test the stage through a camera feed and adjust dimmers, angles, and color scenes. This reveals whether faces stay visible when screens brighten or cues change.
For colored stage lighting, professionals can set the camera’s white balance to its tungsten preset. They set white balance manually, rather than using automatic white balance, so the camera doesn’t shift color as lighting changes. A scene might pair a 3200K spotlight with 5600K ambient lighting. The lighting team can align key fixtures to one color temperature or balance the difference intentionally, then check each cue on camera.
Professionals set manual exposure to keep bright stage areas from overwhelming darker parts of the image. The United States Environmental Protection Agency says automatic exposure can be unreliable when a scene includes both very bright and very dark areas. Operators arrive before the event starts, match exposure to the stage lights, and test changes during rehearsal. This gives the camera a consistent setting as the speaker moves through the scene.
Indoor lighting works with venue fixtures and ambient conditions; outdoor shooting must also account for changing daylight. The U.S. Environmental Protection Agency (EPA) advises avoiding intense sunlight reflections. Venue or local rules can restrict equipment placement or rigging; requirements vary by location. Production teams coordinate the lighting layout with venue AV operators before setup instead of assuming the same restrictions apply everywhere.
Professionals may add portable LED lights when existing stage fixtures don’t provide the needed coverage. The choice depends on the room, camera view, and lighting plan, rather than a universal fixture model. Fixture quantity, setup needs, and control requirements affect project cost; pricing depends on the specific production and is provided after a quote request.
To reduce flicker or banding, operators test LED fixtures through the camera feed, since a fixture’s refresh rate may conflict with the camera’s frame rate. They also coordinate cable and fixture positions with stage operators to avoid blocked views and trip hazards. These checks help video, screens, and lighting cues work as one production.
2. Front or side fill with backlighting
Backlighting separates a speaker from the stage, while front or side fill keeps their face readable. Together, these sources preserve atmosphere without leaving the subject in silhouette. For example, warm backlight can outline a presenter against a dark curtain, while softer fill reveals facial expression. The director should judge the balance through the camera view, not just from the audience seats.
Front fill comes from near the camera’s direction, making facial features clear, but it can flatten the image if it dominates. Side fill approaches from an angle and retains more shape across the face. During rehearsal, operators can compare the speaker’s appearance from each position and adjust intensity until the face reads clearly without losing natural contrast. The right balance depends on the stage look and camera angle.
Backlighting needs careful placement. A fixture aimed directly into the lens can create flare or reduce contrast, while a source behind and slightly to one side can define shoulders and hair. Operators check the camera feed as the speaker moves, then refine the beam to separate the subject without shining into the lens. A camera test also reveals whether the backlight distracts viewers on a large screen.
For a panel, the lighting plan should cover each seated speaker, not just the center position. Side fill can maintain facial detail as panelists turn toward one another, while controlled backlight keeps them distinct from the set. Similar lighting principles are standard in multi-camera interview setups like Podcast Zurich to ensure every participant remains clearly defined on camera. Operators review likely transitions between wide and close shots, since a level that works for one frame may look harsh in another. During the live production, the lighting director can adjust cues as speakers move, maintaining a consistent appearance for the audience and video viewers.
During setup, the production team tests the lighting from every planned camera angle and seating position. This review helps identify glare, unwanted silhouettes, or a bright edge that competes with the speaker. The aim isn’t to remove all contrast, but to use fill and backlight deliberately so faces remain clear while the stage retains depth and character.
3. Reducing shadows and adding depth
A presenter against a plain, brightly lit backdrop can look flat in recorded footage. Side and back lighting help define the person against the stage, creating visible separation between foreground and background. Operators assess the camera image during rehearsal because a shadow that seems subtle from the seats may look more pronounced on screen.
Start by checking where the key light casts shadows. If a presenter’s profile creates a hard outline on a backdrop, adjust the light’s angle or reposition the presenter relative to the background. Carefully placed backlight can frame shoulders and hair, while side lighting adds shape to facial features. The goal isn’t to remove every shadow; controlled contrast preserves dimension.
Projection can also add definition around people on stage. For example, a restrained pattern across the sides or rear of a set can create visual separation without covering the presenter. The technical team should watch the camera feed as the projection changes, checking that the subject remains clear and the background doesn’t compete for attention. Subtle framing often works better than a bright, detailed image behind a speaker.
Distance matters in the composition. When a presenter stands close to a backdrop, their shadow can land directly behind them and merge with their outline. Moving them forward, where the stage layout allows, can separate the subject from that shadow. Operators can then adjust side and rear lighting to shape the scene. The camera view shows whether each change improves depth or introduces distracting glare.
During rehearsal, review both a wide shot and a closer shot before finalizing the look. A wide frame reveals how the lighting defines the entire stage; a close view shows facial shadows and edge highlights. Comparing both helps the team capture a balanced image for different edits instead of judging the setup from one position. The finished footage should retain the event’s atmosphere while keeping performers distinct from their surroundings.
4. Consistent lighting for editing continuity
Editing is smoother when presenters keep a stable base look across stage cues. A consistent core lighting scene gives the camera a reliable starting point, even when colors or effects change around it. For example, a keynote speaker can remain evenly lit while a screen shifts from a title slide to presentation footage. That consistency helps editors cut between camera angles without distracting changes in facial brightness or color.
Production teams can build scene presets for recurring formats, such as a panel, a solo presentation, or audience questions. Each preset can preserve the presenter’s key light while adjusting background accents for the moment. During rehearsal, operators review each transition through the camera signal, checking whether a cue changes skin tone, removes facial detail, or leaves one camera angle noticeably darker than another.
Consistent lighting doesn’t mean every cue must look identical. A musical highlight or closing moment can use a deliberate shift, provided the change supports the action and remains clear on camera. The team can plan where the shift begins and ends, then return to the established base scene. This gives editors a clear visual reference before and after the effect, rather than an accidental jump in exposure or color.
For multi-camera coverage, matching the base look across shooting positions helps the finished video feel cohesive. Operators compare wide and close views during the same cue, watching for differences in brightness and background color. They also consider the final format, since a stage effect that reads well in person may overwhelm detail on a smaller screen. A planned lighting sequence lets editors preserve key moments without masking the event’s atmosphere. To coordinate a dependable lighting plan for your production, discuss event lighting design.
Ambassador Event Production: Video Production Services
Ambassador Event Production provides video production and audiovisual technical support for events where clear, consistent footage matters. Its lighting design and execution can shape the stage for camera, while audio production supports the event’s sound needs as part of the same production.
Bring the team in when you’re planning a live event recording or stream and want lighting, video, and audio considered as one production. Sharing the event format, stage details, key moments, and intended use of the footage helps guide the approach. Contact Ambassador Event Production to discuss your event’s video and lighting needs.
Plan a Clearer View of Your Next Event
Think beyond the event-day look: the recording should serve its intended audience and remain useful after the stage is cleared. That goal can shape how the production is captured, how it supports live viewing, and which moments deserve visual emphasis. A coordinated plan for lighting for video recording at a live event connects the experience in the room with the footage viewers see later.
Ambassador Event Production offers Video Production Services, Audio-Visual Technical Support, and Audio Production Services to support event recordings and their technical needs. If you’re planning an event and want to discuss how those elements can work together, contact Ambassador Event Production. A thoughtful conversation is a practical next step toward video that reflects the event and keeps its important moments clear.
Frequently Asked Questions
What lighting is best for recording a live event on video?
The best setup gives performers clear, even visibility while retaining the room’s atmosphere. For a keynote, that may mean distinct coverage for the lectern and screen-side position; for a panel, the full seating area needs usable light. Professionals shape the plan around movement, camera framing, and the event’s visual style, then assess how it reads in the recorded image.
How many lights and what types are needed for professional live event video recording?
There’s no fixed number of fixtures for every production. A solo presenter in a simple stage layout needs different coverage from a panel, performance, or event with several speaking positions. Professionals plan fixtures by coverage area and purpose, using stage lighting to illuminate performers and adding fill or backlighting where the camera image needs more definition. Room layout and existing fixtures also shape the design.
What color temperature should professional event video lights use?
Choose a color temperature that works with the venue’s existing sources and the desired look, rather than applying one setting to every event. For example, a 3200K spotlight can sit alongside 5600K ambient lighting if the difference is intentional. Professionals consider how these sources appear together on camera and set a consistent approach for each scene, helping skin tones and backgrounds look coherent in the final footage.
How do professionals light a stage for video without disrupting the audience?
Professionals position and aim fixtures to illuminate the stage without sending direct glare into audience sightlines or camera lenses. They plan placement around seating, screens, and performer movement, then assess the view from audience areas and camera positions. During rehearsals, cue timing can be refined so light changes support transitions without distracting viewers. The goal is clear stage visibility and a comfortable experience in the room.